Call us today 0207 32 32 999
For homeowners, being able to undertake even the most basic home improvement projects and DIY tasks is becoming increasingly important. Knowing how to carry out quick fixes around your home can not only save some valuable time and money in the event something small goes wrong, but can also help to ensure easily fixable issues don’t get left to become serious problems.
Thankfully, we live in an era where basic home improvement skills can be taught and learnt in no time at all. With the help of the internet, people are finding it easier than ever to locate answers to their most burning DIY questions – but what are these exactly?
We’ve done some research and uncovered the most commonly asked DIY questions, based on monthly search volume. Here are homeowners’ most Googled DIY questions (and the answers to go with them!)
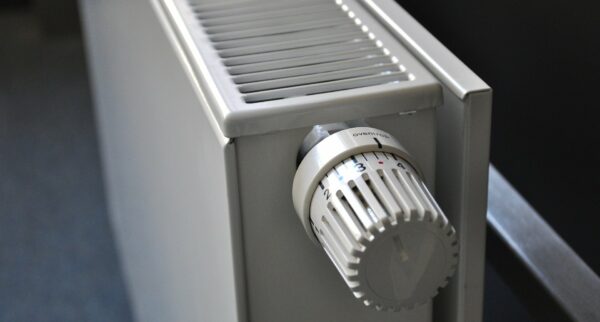
‘How to bleed a radiator’ topped the list of the most searched for DIY terms, averaging a monthly search volume of 21,810. Bleeding a radiator is something that could potentially fix any number of radiator problems including clunking or banging sounds and cold spots – which are common signs of trapped air. Luckily, radiator bleeding is fairly straight-forward once you know how to do it.
Step one, turn off your heating and wait for the radiator to go cold. Next, locate the bleed valve (usually somewhere near the top of the radiator) which will let any trapped air escape when opened. To open the valve, you’ll need either a screwdriver or a radiator key – the likes of which can be purchased relatively cheaply from your local home improvement shop. On that note, make sure you have an old rag or cloth under the radiator to soak up any water that may trickle out when you open the valve.
Once this is all in place, use your radiator key to open the valve by gently turning it counter-clockwise. As you turn the valve, you should hear a hissing sound, signalling that the trapped air is successfully escaping the system.
Whenever the noise stops completely and you see a little bit of water starting to trickle out, that means all the trapped air has escaped and you can go ahead and close the valve again by turning it clockwise.
Repeat on as many radiators as you need, but be sure to regularly check the pressure gauge on your boiler to ensure the system still has optimal pressure! If it doesn’t, it may be necessary to rebalance it.
Coming in a close second place was ‘how to read a smart meter’ with a monthly search volume of 21,520. Given the growing popularity of smart meters, this is definitely knowledge worth having.
Smart meters vary depending on the model and if it’s an electricity or gas meter, but remember when taking any reading taken on a smart meter, you should disregard the numbers after the decimal point.
The thing to look for here is the reading that has ‘M3’ directly after or below it. Details on how to find the reading on different types of smart gas meters are below.
- Keypad: For these meters, the first thing you need to do to find a reading is press the number 9 key. This should trigger the word ‘VOLUME’ to come up on the screen, followed by a line of numbers and an ‘M3’ in the bottom-right corner. Your reading will be all of these numbers before the decimal point. Eg, 00123.45 will be a reading of 123.
- A and B buttons: For meters with A and B buttons, you’ll first need to press the A button and hold until you see the ‘METER INDEX’ message. The reading you need will appear beneath this. Similar to the keypad meters, remember to ignore the numbers after the decimal point.
With an electricity smart meter, you’re looking for the number that has ‘KWH’ after it. Again, finding the reading will vary depending on which type of meter you have.
- Keypad: Similar to keypad gas meters, the first step is to press the 9 key. After this ‘IMP KWH’ should appear followed by the 8 digit reading and the letters kWh in the corner. Again, ignore the decimal point making the number 0023456.7 a reading of 23456.
- Keypad Economy 7 meter: This type of meter looks similar to a keypad meter, but operates in a different way because it has two separate readings for daytime and off-peak usage. In this case, push 6 until the code ‘IMP R01’ appears. The 8 digits following this will be your off-peak reading. To find the daytime reading, continue to press 6 until ‘IMP RO2’ appears and read the 8 digit number that follows. Once again, ignore numbers after the decimal point!
- A and B button: To find the reading, press A until the message ‘TOTAL ACT IMPORT’ appears, with your reading then appearing underneath it. As always, do not include the numbers after the decimal point.
- Two button meter: For the meters with two buttons, you need to press the ‘Display select’ or simply the ‘Display’ button (depending on the model). The number that appears before the decimal point and followed by a kWh is your smart meter reading.
- Three button meter: With a three button meter, you’ll need to press the middle button to find your reading. Once you press it, the letters ‘IMP’ should appear and your reading will be below it. If you have a 2-rate meter, pressing the middle button again will show you all the available readings. R1 shows a rate 1, R2 will show a rate 2 and T will display the total.
- In-Home Meter Screen: If you have an in-home meter screen, you may be able to see your reading from there. Things will vary depending on which model of in-home screen you have, however, readings can often be found by pressing the ‘Select’ button and scrolling down the list until you reach ‘METER READING’ – from here you can switch between viewing your gas and electricity readings.
Coming in third place was ‘how to measure curtains’. The popularity of this question may come as no surprise given the ability of a great pair of curtains to transform a space. However, with so many different design and sizing options on offer, it’s important to take a few key measurements and narrow down your options.
Start by measuring for a curtain rod. These come in a wide range of different sizes, and there’s no set rule as to which size you must select for a particular window width. However, as a general rule of thumb it’s best to choose a rod that extends at least three inches past the edge of the window frame. That way your curtains will hang perfectly at the edges of the window.
The length of your curtains is also a matter of personal taste. Some prefer curtains that end just above the windowsill, while others will hang curtains that finish just below it. For a more dramatic look, full length curtains are another good option. Measure from the height of your rod to your preferred length and you’ll soon have an idea of the right length for your curtains.
When it comes to width, you’ll need to be a little more precise. In many cases, curtains are sold separately, so the width stated will usually be the width of a single panel. Check the details of your chosen product to determine whether or not it’s a single curtain or a pair being sold to avoid being caught out.
Measure your window width, then calculate the approximate width of the curtains you’ll need. Bear in mind that you’ll need curtains that are far wider than your actual window to achieve a full look.
The wider the chosen curtains are, the more full they’ll look. Typically, opulent interiors tend to feature particularly heavy, wide curtains which really draw the eye. If you prefer a more minimalist style, opt for a slightly shorter width.
Don’t worry if you can’t find curtains in your exact measurements, as curtains are easily altered. If in doubt, purchase curtains that are wider and longer than you think you’ll need, and have the hems altered to ensure that they fit your windows perfectly.
Averaging just over 12,000 monthly searches, ‘how to fix a leaking tap’ also proved to be an incredibly popular question from homeowners. Having a leaking tap is one of those small problems that can cause a great deal of inconvenience if left unfixed. So, if your tap is leaking and you need to fix it fast, there are a few things you can do.
First things first, you’ll need to work out what’s causing the leak. Check where the leak is coming from to determine what the problem might be. If you can see water leaking from the spout of the tap, then it’s likely that you’ll need to replace the washer. If, on the other hand, you can see water leaking underneath the handle of the tap, it’s more likely that the o-ring of the valve is the problem.
When leaks start to trickle out from under the spout of the tap, it’s often caused by the o-ring of the spout itself, and in these cases it’s this part that will need to be taken out and replaced.
Before you start taking the tap apart and looking into the particular parts that need to be repaired or replaced, there are a few things you need to do. Firstly, you’ll want to switch off your water supply. When the water supply is turned off, you can open the taps and release any built-up pressure in the system.
It’s a good idea to put the plug in your sink before you begin. This will stop any small parts accidentally falling down the plughole, never to be seen again! Make sure you’ve got all the tools you’ll need before you start, and check that the tools you have for the job won’t scratch or damage your sink as you work.
When everything is ready, you can dismantle your tap, paying particular attention to the area where the leak is coming from. When you spot the o-ring or valve that needs to be replaced, you’ll be able to take this out and put a new part in its place. Tighten the washer or valve once it’s back in, but don’t overdo it because this too can cause damage to your new part.
Once you’re happy with the replacement, start putting your tap back together. When the tap is ready, turn the water back on and slowly twist the handle to turn on your tap. You should find that the leak has stopped and your tap is back up and running as normal.
Homeowners aren’t the only ones with burning questions. When it comes to renters, the most popular question is not surrounding DIY tips, but is instead regarding their landlords responsibility when it comes to fixing, replacing and maintaining things around the property.
While many jobs around the house can easily be fixed by an experienced DIY enthusiast, if the property is rented the situation is sometimes a little more complicated. Those who rent their homes are entitled to a degree of protection from their landlord, and this includes a considerable number of typical household maintenance tasks.
When things go awry in a rental property, the landlord should be the first port of call. Landlords are required to undertake any necessary repairs to the overall structure of the house (both interior and exterior), as well as maintenance tasks relating to heating, hot water systems and plumbing.
Safety is of course hugely important in both owned and rented properties, but in rented properties it is up to the landlord to make sure all the right safety checks have been carried out. Landlords must make sure safety checks have been done by a qualified professional, in a timely manner. Landlords are also responsible for checking that all gas appliances are safe for tenants to use, and that electrical appliances are working properly and pose no danger to tenants.
Fire safety is another key area of concern in rental properties, and this too is the responsibility of the landlord. Those renting properties to tenants must ensure that all furniture and furnishings included in the rental have undergone the relevant fire safety checks, and that there is a working smoke alarm installed on every floor of the building. Carbon monoxide alarms should also be installed if there is a fuel-burning appliance in the property.
In essence, landlords’ responsibilities cover all major maintenance tasks, from regular boiler checks to fire safety checks. They must also step in if any repairs are needed in their properties, and these range from simple plumbing tasks like leaky taps to urgent matters like a broken heating system. Renters too must ensure that landlords are kept updated on any repairs that the property might need, to ensure that issues are fixed quickly.
