Call us today 0207 32 32 999
If your household radiators are making noises when they warm up, they may well need to be bled. Radiators that aren’t heating up effectively can also sometimes need bleeding, particularly if there are cold patches on the radiator. If radiators remain cool to the touch even when the heating is on, then it’s also possible that your radiators require bleeding.
All of these signs point to one problem: air in the system. When we bleed radiators, we let that air escape, and radiators work far more effectively as a result. If you’re thinking about bleeding your radiators but you’re not sure where to start, read on and we’ll talk you through it.
Table of Contents
ToggleWhy Do You Need To Bleed a Radiator?
Radiators don’t always need to be bled. However, if you’re experiencing any of the issues mentioned above, it’s well worth bleeding the radiators to check if that’s the cause of your problems.
Radiators require bleeding when air gets trapped inside the conduits, causing the water inside the radiator to circulate poorly. This poor circulation causes the radiator to be less efficient.
If there is air trapped inside, the radiator may even end up using more energy than necessary to heat your spaces, meaning that your heating/utility bills could end up being significantly higher than necessary.
How To Check If Your Radiator Needs To Be Bled
The following steps will illustrate how to check and see if your radiators need to be bled.
First, turn your heating system up as high as possible, and give the radiators in your house enough time to reach their optimal heating potential.
Next, while being cautious and making sure not to burn your hands, begin to feel along the top edges of your radiator, checking for cold spots or any areas that don’t seem to be quite as warm as the rest of the radiator. These cold spots are a clear indication that air is trapped somewhere inside the system, and that you need to bleed the radiator.
We should also mention that each radiator in your home is independent from the others. Therefore, just because you’ve found cold spots on one of your radiators, it does not necessarily mean that each of your radiators will need to be bled. Check each one individually. You only need to bleed those that have cold spots present.
How To Bleed A Radiator
There are several steps involved in bleeding your radiators. Follow these steps carefully, to learn how to bleed your radiators. Before long you’ll have them back to their full working order.
The first, and most important step before bleeding your radiators is to make sure that the heating system is turned off. Wait until the radiators have cooled down completely so that you won’t end up burning yourself when you bleed the radiators.
At this point, it might be a good idea to give the radiators a little extra time to cool down, since even though the radiator may feel cool to the touch on the outside, the water on the inside might still be extremely hot and could even cause burns if proper care isn’t taken.
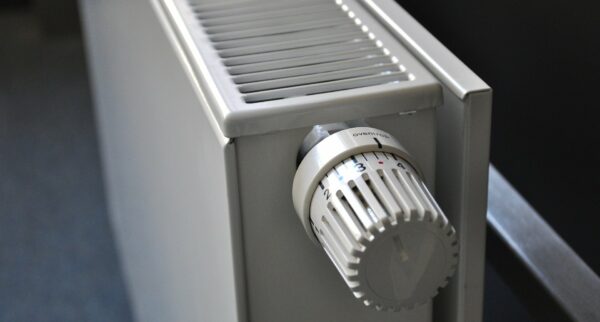
Once you are certain that the radiator has had sufficient time to cool down, you can use a screwdriver or radiator key to open the radiator bleed valve. The bleed valve is usually located somewhere along the top of the radiator. It’s designed to allow air to escape easily once it’s opened.
The valve will need to be turned counter-clockwise in order to let out any air that is trapped inside. Anywhere from a quarter turn to a half turn is usually sufficient to let the air escape.
If you don’t have a radiator key, you can pick one up relatively cheap from almost any home improvement store in your area.
Now, before opening the valve, make sure to have a couple pieces of cloth or rags placed under the radiator to catch any water that may end up leaking out. Then, gently turn the key, and slowly open the bleed valve. As you turn the key, you should soon start to hear a hissing noise. This is the air trapped inside escaping from the system.
Wait until the hissing sound stops. At this point, you should also be able to see water start leaking out of the valve. This means that the system has been bled completely, and there is no longer any air trapped inside.
So, as soon as the noise stops, and you see water leaking out, turn the key clockwise, closing the valve and sealing the system shut once again.
After this, repeat the process on any other radiators that were found to have cold spots. Then, once you’ve bled each radiator independently, it’s important to check your boiler’s pressure gauge to make sure there is still sufficient pressure in the system for it to run properly.
If you check the gauge and see that the pressure is low, you’ll need to rebalance the system. On the other hand, if the pressure still reads as normal, you’re free to turn on the heating system and check the radiators again to make sure that they are functioning properly and no longer have any cold spots on them.
How to Bleed a Radiator: Final Tips From Our Experts
One important tip to remember is that your radiators should always be bled in a specific order.
If you have more than one floor in your home, it’s important to start by bleeding the radiators on the lower floors first and then working your way to the top floors of your house.
Also, remember to start with the radiators that are furthest away from the boiler to avoid letting air back into the system as you make your way along the water lines.
How To Bleed Your Radiators: A Quick Step by Step Guide
- Check which radiators need to be bled.
- Turn the heating system off and allow sufficient time for radiators to cool down.
- Prepare the work area with cloths or rags to absorb any water that gets out.
- Bleed radiators individually, starting with those on the lowest floors that are furthest away from the boiler.
- Check the boiler’s pressure gauge to ensure there is still sufficient pressure in the system to function properly.
- Turn the heating system on and double check to make sure there are no longer any cold spots on your radiators.
Photo by Bernard Hermant
